Pump Selection.com specializes in Sump Pumps, Parts And Water Pumps. We Provide Reviews, Guides and Quick Shopping Sump Pump Installation

See How to Install Submersible, Battery Backup, Water Powered, Pedestal And Combination Sump Pump

See How To Install Before Buying A New Pump

Best Pump Selection for your Water Pumping Needs
×EASY INSTALLATIONINSTALL BY PUMP TYPESUBMERSIBLE STEPSBATTERY BACKUP STEPS INSTALLATION BY VIDEO SUBMERSIBLE VIDEOBATTERY BACKUP VIDEOWATER POWER VIDEOCOMBINATION VIDEOPEDESTAL VIDEOQUICK SHOP PUMP TYPES HELPFUL RESOURCE LINKS
 

Sump Pump Installation Is Easy We Do It

Sump Pump Installation is not hard. We tried it several years ago. We learned there is nothing we could break. We just had to be sure the pump rested flat on the bottom of the basin, that the float cleared the basin wall by at least four inches so when the pump moved during heavy pumping the float switch would not get hung up, and that we solidly glued the discharge pipes together so leaking would not occur. We chose a sunny day, started early in the morning, and made sure it was a day plumbers worked in case we had a problem. Our installation went perfect and we have been installing our sump-pumps ever since. There is no need to hire a plumber. Hopefully the videos below will give you more confidence so you to can install your own sump-pumps. It is a great feeling of accomplishment and gives us peace knowing that if your pump should ever fail during a rainstorm, we can put in a new one ourselves rather than be left dependant upon a plumber's schedule. Since we never know when our pumps may fail, we always have a new one on hand.

Hopefully the following videos will be helpful and give you the confidence needed to do a sump pump installation.

PAGE-MENU


Sump Pump Installation By Pump Type

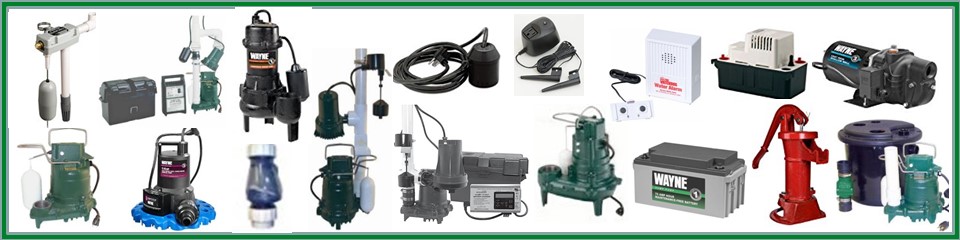
There are five basic sump pump installation types: submersible, battery backup, water powered, pedestal and combination. The submersible and pedestal are easiest. The battery backup and combination are harder because there is a control box and battery install. The wster powered is challenging because it must be piped into the house city water system.

Steps and videos are provided below for each type of installation. Always be sure to check the manufactures manual for additional and specific brand related information.

PAGE-MENU
 

Submersible Sump Pump Installation

The submersible is easy to install. The biggest challenge is to make sure it will fit in the pit, especially if there is a backup-pump as well. Regardless of the pump brand, installation is basically the same.

Twelve Basic Steps For Submersible Sump Pump Install

  1. 1) Disconnect power.
  2. 2) Disconnect old pump from discharge piping.
  3. 3) Drain water from pipes
  4. 4) Remove old pump from the basin.
  5. 5) Clean the basin bottom of debris such as pea gravel because this can cause the impeller to fail.
  6. 6) Attach the small length of discharge piping into the pump port. Most models require a small hole in the discharge pipe to prevent air lock.l
  7. 7) Set the new pump in the pit making sure the float and switch have adequate clearance and will not hang-up on the pit wall. The float must be free to move throughout its travel and not contact the pump body, piping, or other objects.
  8. 8) Connect the discharge pipe to the discharge of the pump. HAND TIGHTEN ONLY. Over tightening may cause the pump housing to crack. Install a union as a means of separating the discharge line from the pump discharge pipe just above the floor to facilitate removal of the pump when necessary.
  9. 9) Install a new check valve just above the union or in place of the union to prevent the backflow of water after each pump cycle.
  10. 10) Connect additional piping as needed to direct the discharged water to the desired location. The Discharge should be kept as short as possible with a minimum number of turns. Check all connections for security.
  11. 11) Plug the pump into the electrical outlet.
  12. 12) Test the installation by adding water to the pit to cause the pump to run. Check for water leaks and make sure the float and switch are not rubbing against the basin wall.
PAGE-MENU
 

Battery Backup Sump Pump Installation

The battery backup is more complicated to install because both the pump and the control box with the battery must be hooked up properly muchless the challenge of finding enough room to fit the pump in the basin. Using the manufactures manual will provide detail as well as illustrations. Hooking the battery up in the right sequence is extremely important. Follow the manual carefully.

SIXTEEN Basic Steps For Battery Backup Sump Pump Install

  1. 1) Locate the ON level of the primary-pump. Mark it on the discharge pipe.
  2. 2) Drain the pit.
  3. 3) Unplug the primary-pump.
  4. 4) Separate the discharge pipe so the pump can be removed. Be ready to catch any water with a bucket.
  5. 5) Remove the primary
  6. 6) Do a dry run. Set both pumps on the basin floor to see how much room is available. If there is not enough room for the backup on the floor, it can be installed inline (atteched to the discharge pipe used by the primary, but placed above the primary.
  7. 7) Attach discharge pipe into the port of both pumps. The length will be determined by the pit height and length of the check valves for each. Identify the height at whicht he tee will be placed. The tee must be above the check valve for each. A tee is used so both pumps use the same discharge piping leading to the final destiation of the removed water. (Exterior)
  8. 8) When the height of the above step is finalized, attach the check valve, cut or add piping as necessary and glue the discharge piping and tee in place.
  9. 9) Attach the backup float switch to the discharge piping just above the ON point for the primary.
  10. 10) Place the battery box with the battery near the basin, preferrably some height from the basement floor in case of flooding.
  11. 11) Place the control box head on the battery box. Follow the manufacturers instrucitons for connecting the control unit.
  12. 12) Also follow the manufacturers instuctions regardsing battery hook up to the controller and the indicator lights.
  13. 13) Plug in the charger based according to manufacturer. Note the indicator lights and if connection are proper.
  14. 14) When all indicator lights are correct, plug in the primary pump. Add mater to trigger the float switch to start the pump. Watch for leaks.
  15. 15) Unplug the primary pump and fill the basin again with water to trigger the backup float switch to cause the backup pump to operate. Watch for leaks and proper indicator light operation.
  16. 16) When the test is complete, plug the primary in again. The sump pump system is ready for use.
PAGE-MENU


Pedestal Sump Pump Installation

The pedestal is easy to install because the motor sits above the sump pit and thus it does not require as much room in the pit. The biggest challenge is measuring the length of the discharge pipe properly and adjusting the float tether to the proper length.
 

Water Powered Sump Pump Installation

The water powered is more complicated to install because it involves hook up to the city water piping in the house. One advantage is that it does not take much bains space. The BasePump brand takes the least amount of space.
 

Combination Sump Pump Installation

The Combination comes preassembled with a Primary and Battery Backup; however since there is a backup, a control box and battery require the proper set up. Refer to the primary and backup installtion steps above and the manufacturers manual.
PAGE-MENU


Sump Pump Installation By Video

Select the type of sump pump installation you wish to view below or scroll down to see them all.

We provide video installation for each of the sump pump types. Seeing something done brings clarity to any project.

(SELECT THE SPECIFIC SUMP PUMP INSTALLATION TYPE YOU WISH TO SEE Or SCROLL TO SEE ALL)
 
PAGE-MENU


Primary Sump Pump Installation


Battery Back Up Sump Pump Installation (Watchdog Sump Pump)


Installing The Combination Sump Pump


Installing A Water Powered Sump Pumps (The Basepump)

Installing a Water Powered Sump Pump (The Liberty SJ10)


Pedestal Sump Pump Installation

 
Go to top of page.


QUICK WAY TO SHOP FOR PUMPS, PARTS, ACCESSORIES

Here is an opportunity to shop the Sump Pump Types shown in the videos above. Shop Best Sump Pumps, Parts and Assessories.

SHOP WATER PUMPS, PARTS AND ACCESSORIES BY TYPE AND BRAND

SHOP ALL BRANDS BY PUMP TYPE

SHOP ZOELLER PUMPS PARTS & ACCESSORIES

SHOP LIBERTY PUMPS

REVIEW SUMP PUMPS BY BRAND


REVIEW SUMP PUMPS BY MODEL

PUMPS SELECTION REVIEW BY COMPARISON TOP 20 SUMP PUMPS


BEST SELLERS

BEST SELLERS PUMPS

DETAILED PUMP REVIEWS

ALL BRANDS

OTHER HELPFUL WEBSITES

RELATED WEBSITES


OUR MISSION

THE HELPFUL PUMP PLACE where you can become an educated shopper. Review - Compare - Shop for the Best Water Pump For Your Water Pumping Needs.

SHARE US


Share Us On FacebookShare Us On TwitterShare Us On InstagramShare Us On LinkedInPin US On PinterstBook Mark Us On Hartena
 
 
Copyright All Rights Reserved
Find the best pump selection for your pumping needs today at lowest prices.
pumpsselection.com